
Getting Started with vHUB
vHUB is our 3D Data conversion, Assets and Project management platform. To create a Project that uses 100% of the available features in vSTAGE, vHUB is a necessity, as it will allow us to manage User rights, add and edit 3D groups for the Organization to use, as well as create a library of various Media files.
To start your first vSTAGE Project, we need to fulfill some prerequisites in vHUB.
- Have an account where the User possesses either an Administrator or Editor license.
- Upload 3D Data for conversion so it can be integrated to any future Project.
- Upload Media files (2D Images, Audio, Video etc.) that you might use as supplementary elements in your presentation
Login
To login, proceed to www.vhub.ch and input your credentials. You should have received an account and password from us.
Upload Your First Assets
Inside vHUB there are 5 important categories of functions the User can manage, Apps, Projects, Library and Admin, if the User account has an Administrator license. For now we will focus on adding Data to the Library.
Add a non-3D Asset
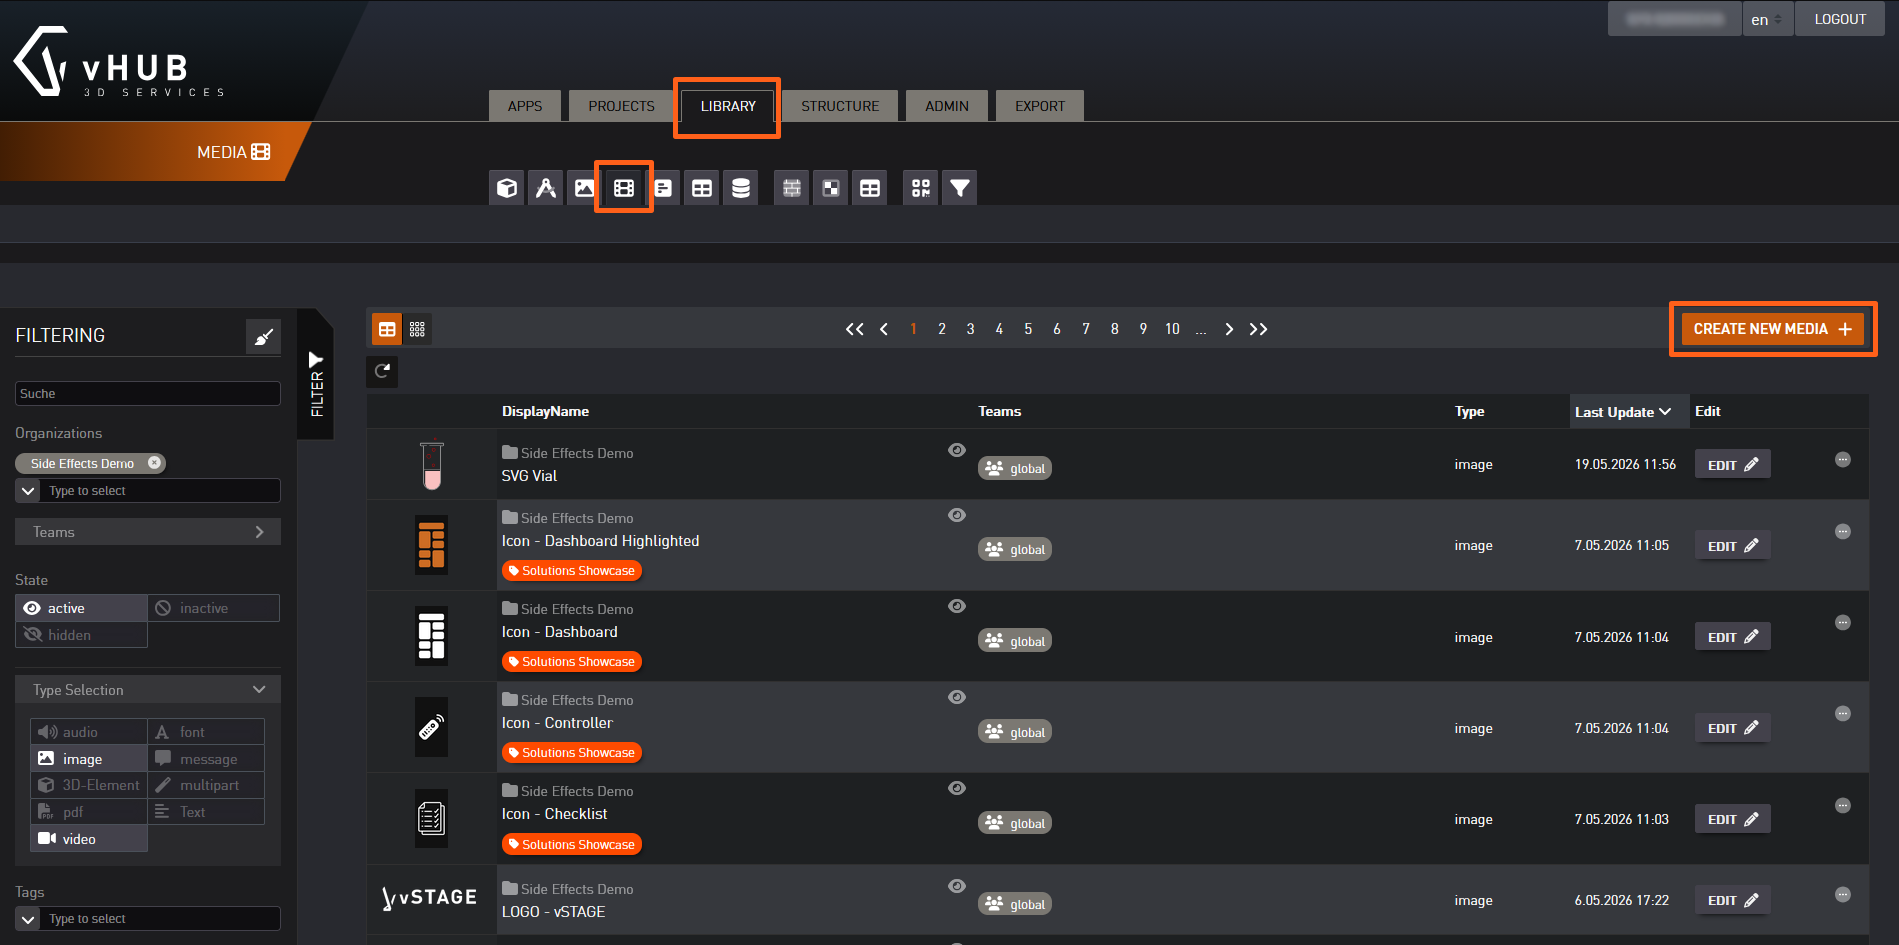
You can add all kinds of non-3D Assets (Images, Videos etc.) under the Media Tab in Library. Click the orange CREATE NEW MEDIA button on the top right.
You can find detailed instructions on the Media (login required) page.
Add a 3D Asset
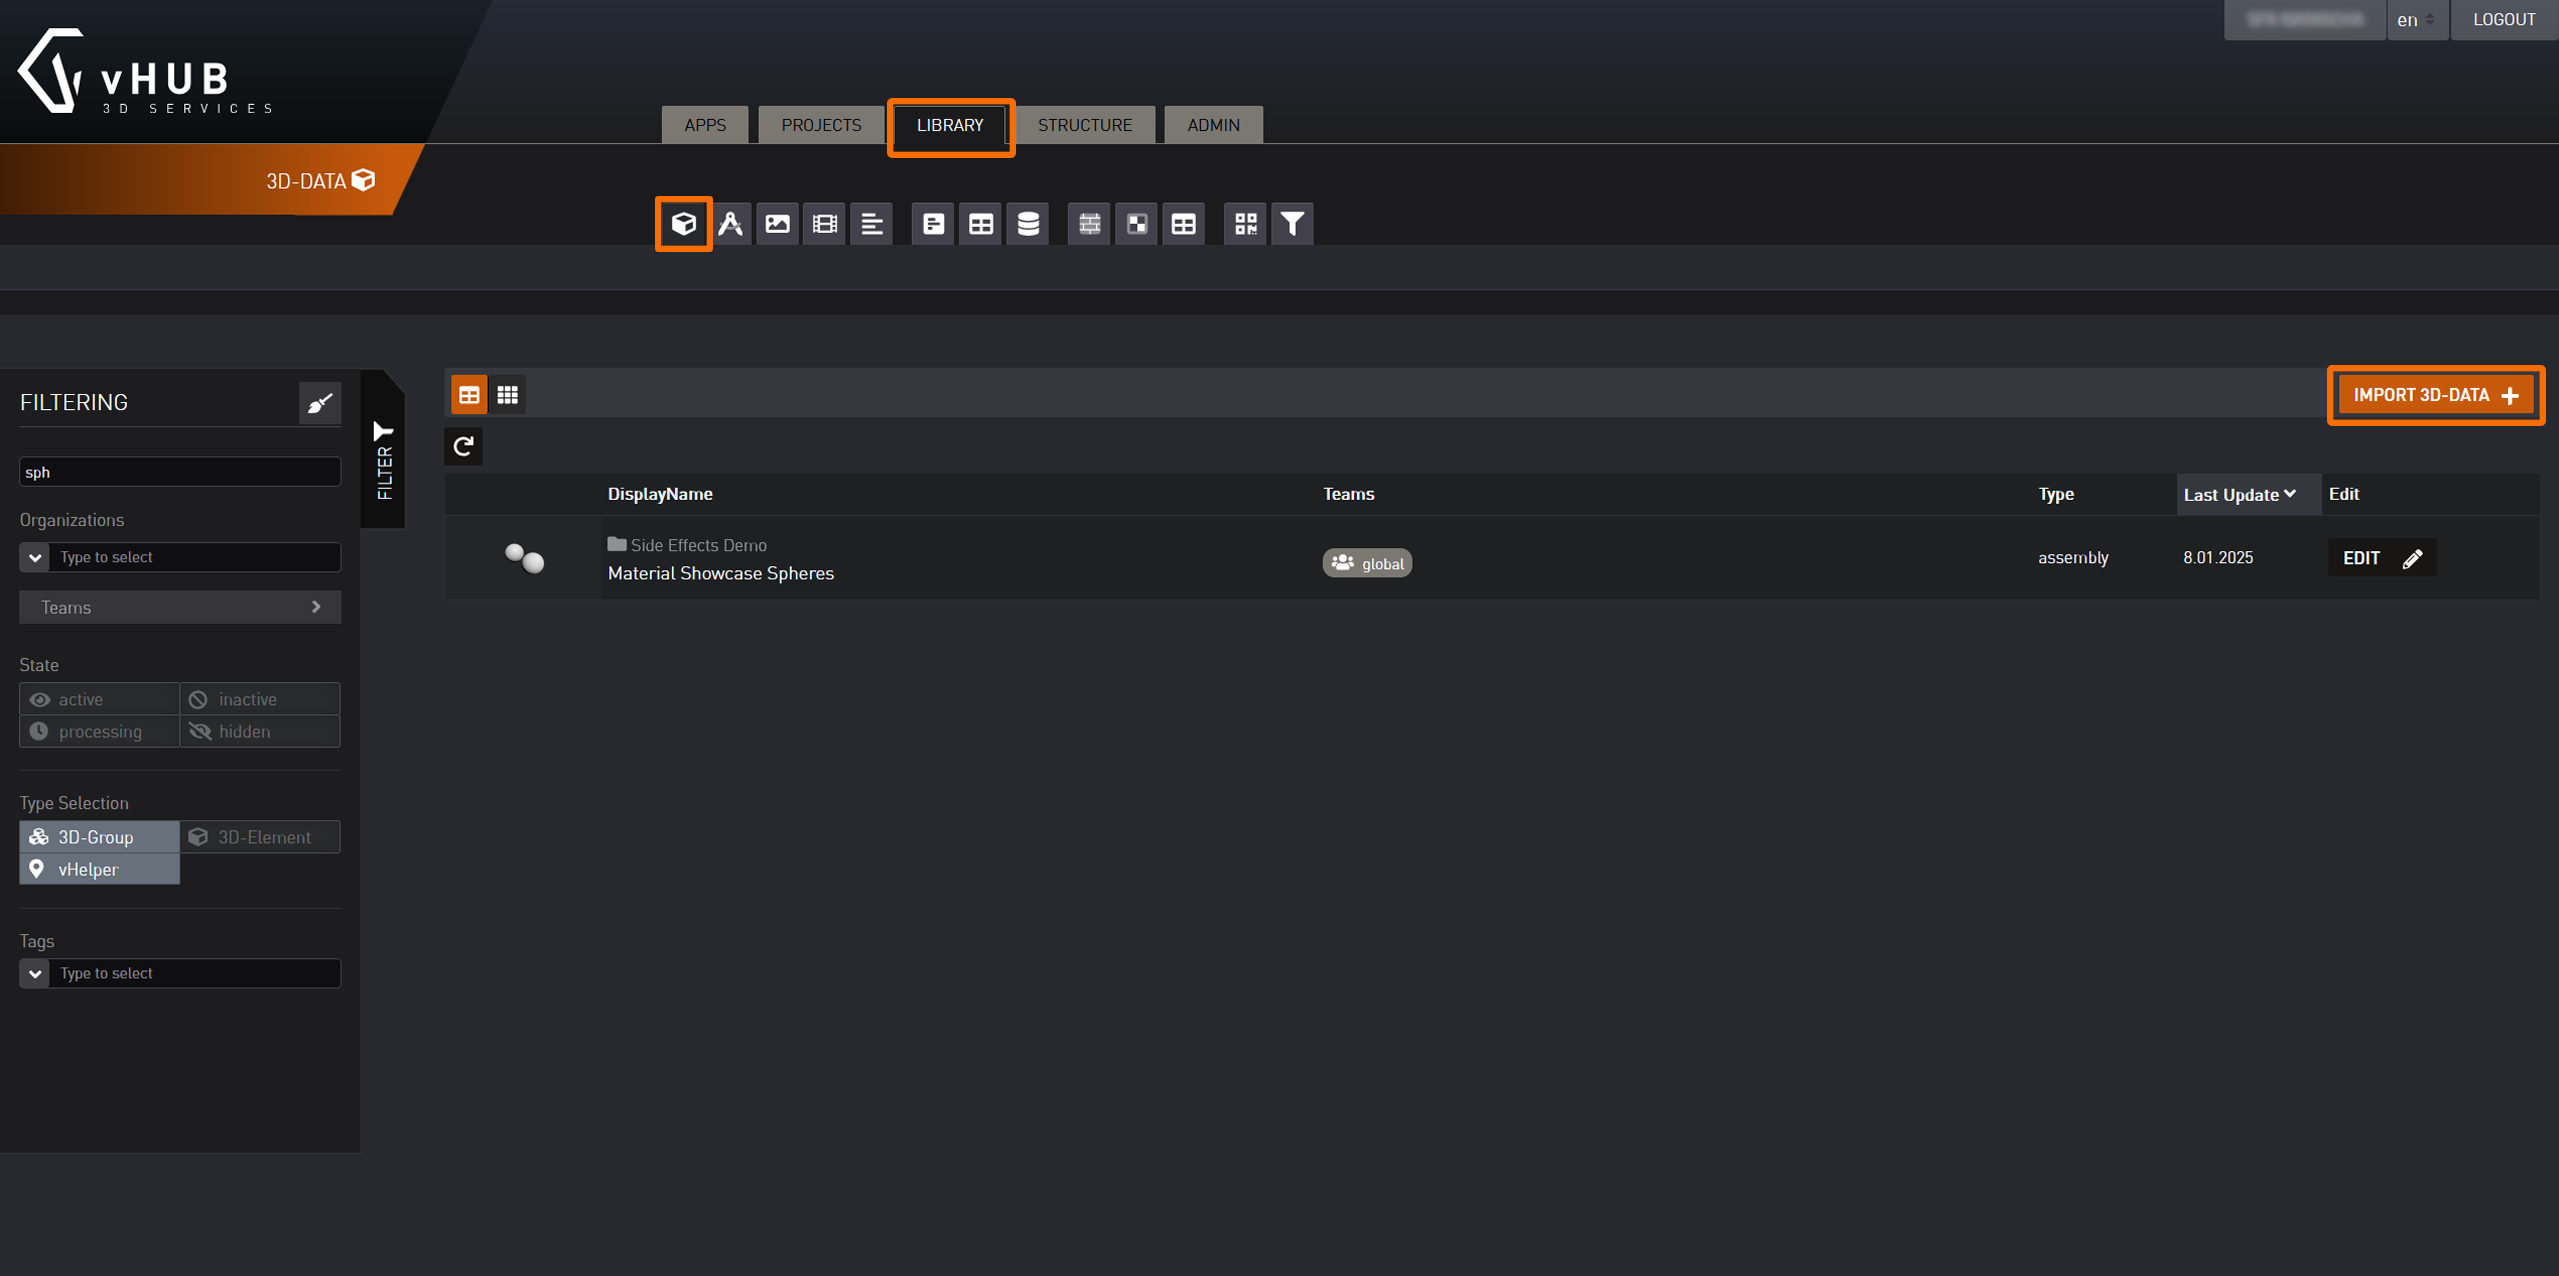
Head to the 3D-Data tab found under the Library section and click on “IMPORT 3D-DATA” on the right. You’ll have to name your assembly and upload it to the page. Once uploaded you have to start the Import.
You can find detailed instructions in the Importing 3D Data to vhub (login required) page.
Getting Started: vSTAGE
On running vSTAGE, the User will be prompted with a login screen, with input box fields for your credentials, login options and Advanced options.
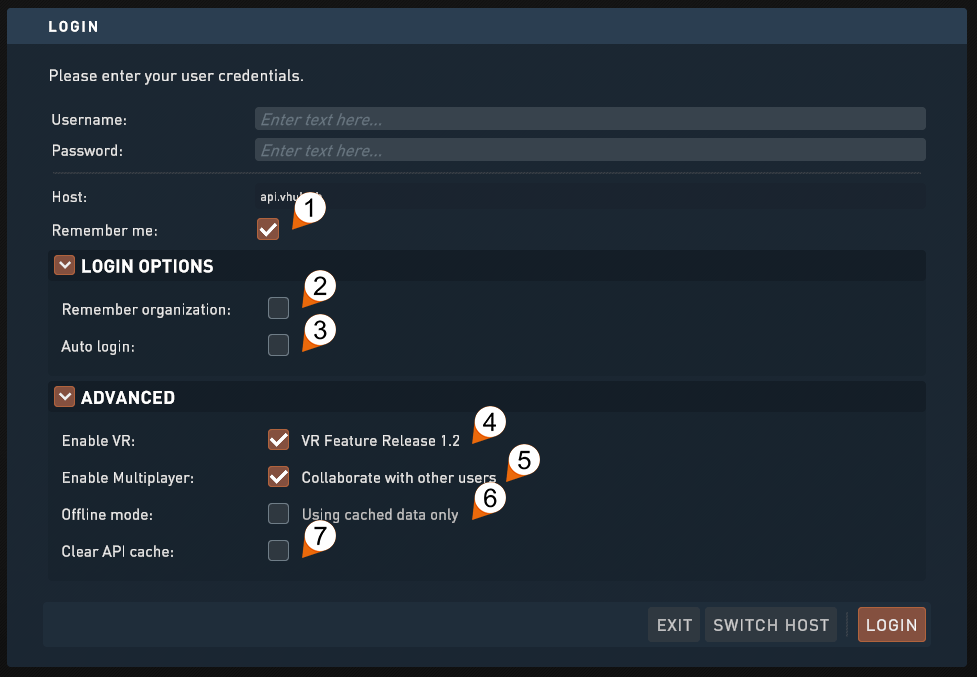
- Remember me: If checked remembers your Username and Password and fills them out automatically. Also works for MFA
- Remember Organization: Will remember which organizations you logged into.
- Auto Login: Automatically logs you in the next time you open vSTAGE. MFA might require the Authentication code.
- Enable VR: Enables VR
- Enable Multiplayer: Enables Multiplayer.
- Offline Mode: Offline Mode lets you open downloaded projects that you’ve opened before, without an internet connection. vFORM will not display.
- Clear API cache: Clears all requests made to the API that have been cached.
Upon finishing the login process the User is presented with the vSTAGE project menu (login required).\
Creating a Project
Under the “Projects Local” tab the User can create a project (login required) by following these steps:
-
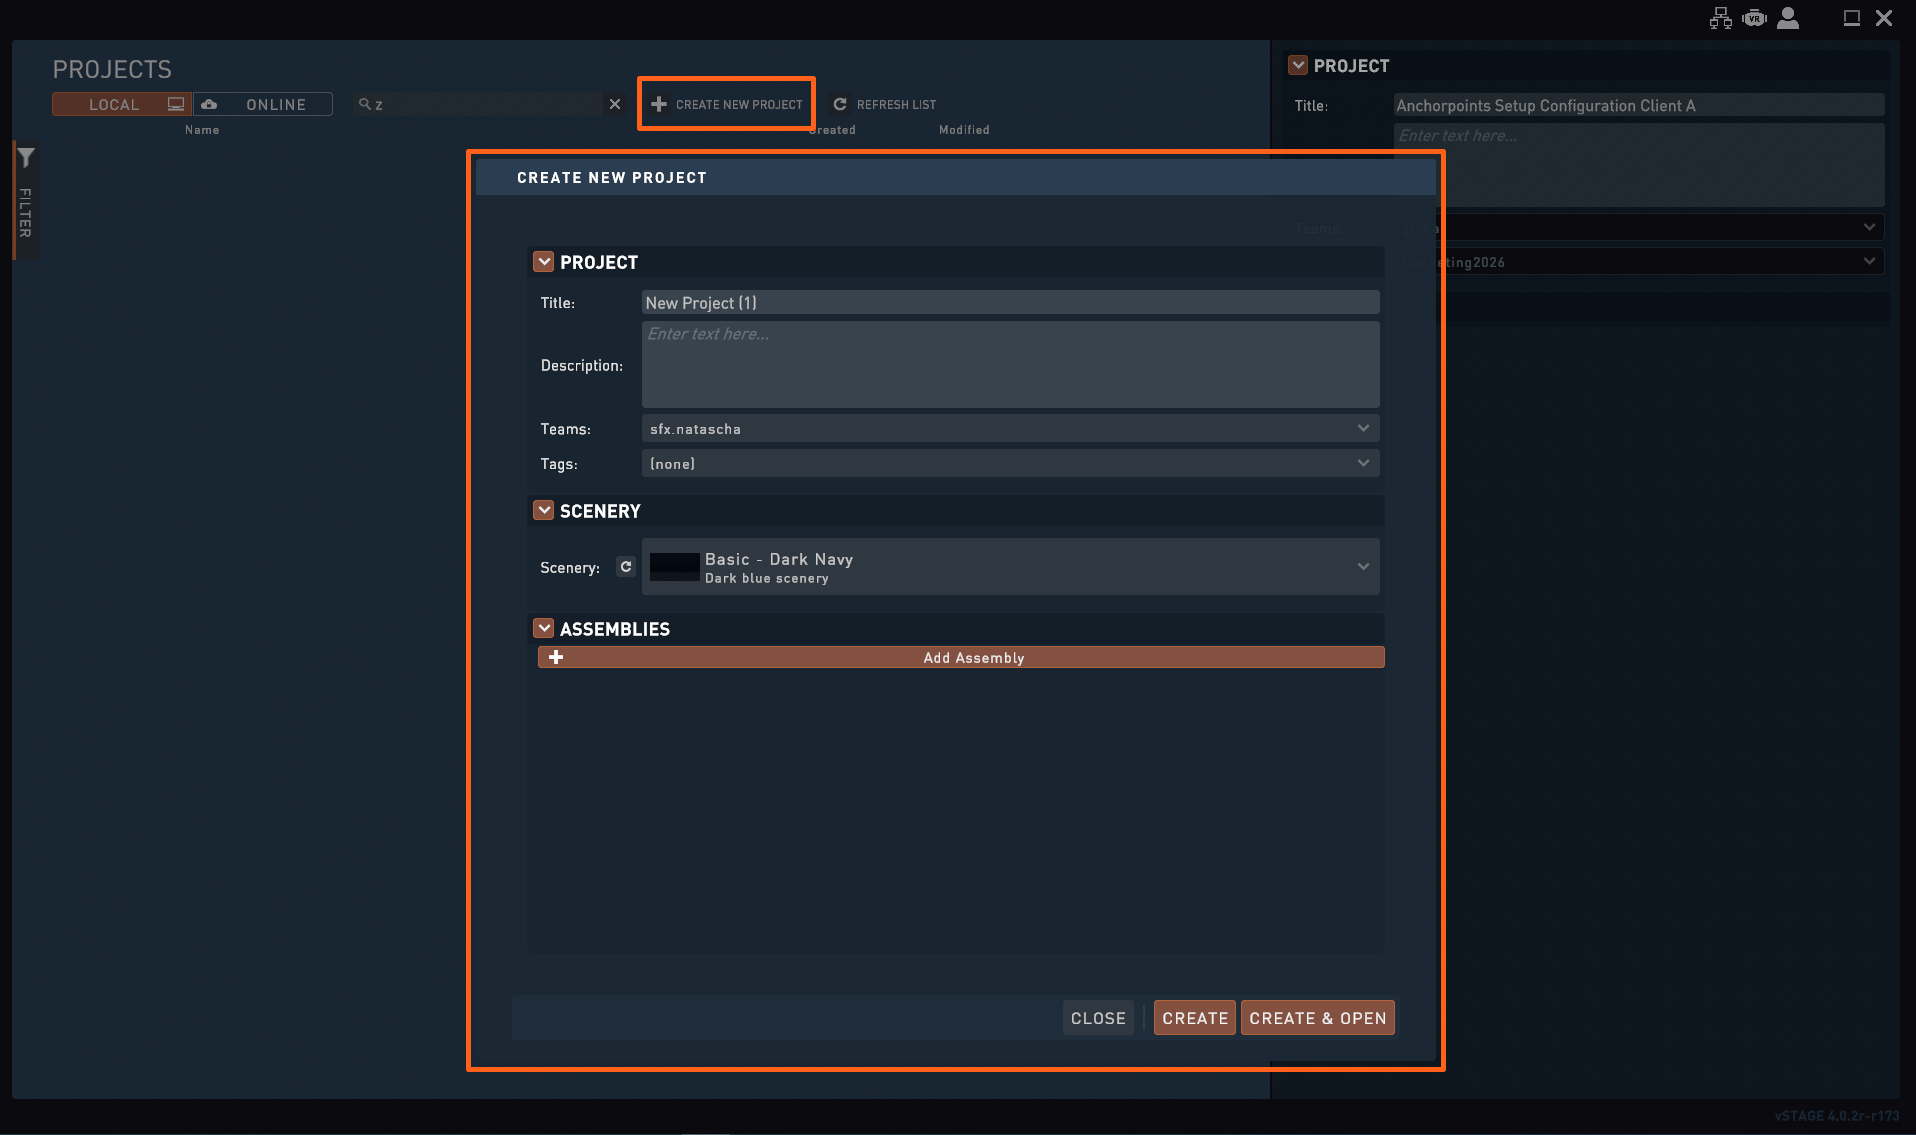
Click on the “CREATE NEW PROJECT” button
-
Fill out the “NEW PROJECT” pop-up.
- Assign a project title.
- Give it an optional description.
- Assign what teams can access this project.
- Choose a scenery to use in the dropdown.
-
Add 3D groups by clicking on Add Assembly.\
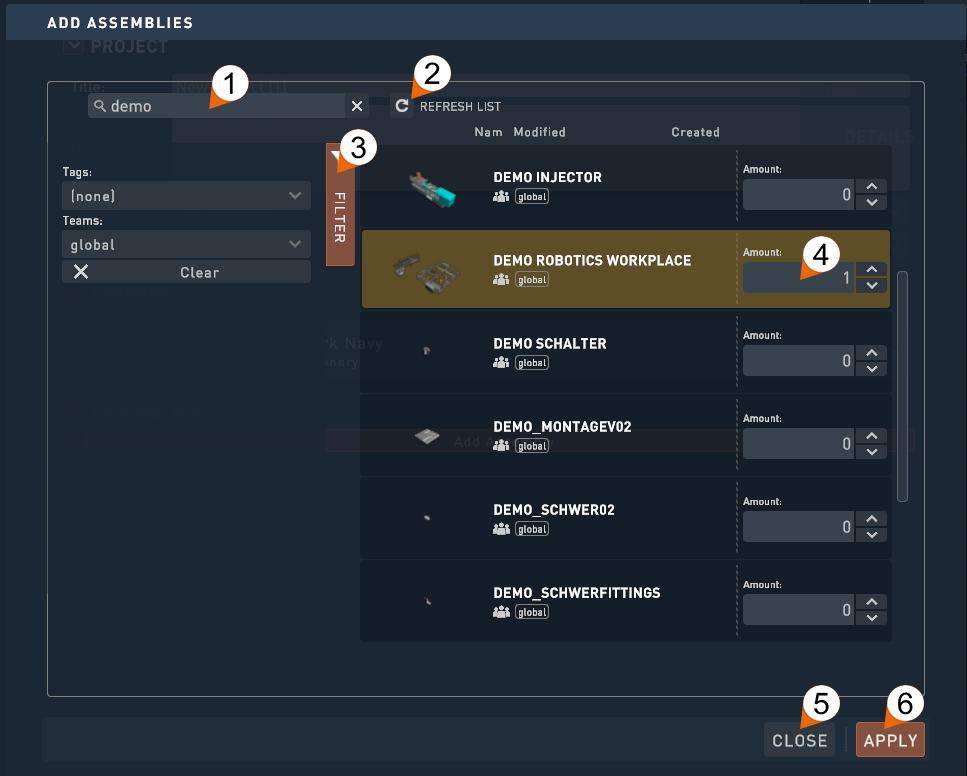
- 1. Enter the assembly name to filter for it
- 2. If an assembly does not show up, try refreshing the list.
- 3. The Filter lets you filter via assemblies via their teams and tags. Press clear to clear the filter
- 4. You can add one or multiple different assemblies at once.
- 5. Closes the popup and doesn’t add anything
- 6. Adds all selected assemblies to the project. Closes the popup.
- Click on the “CREATE” to finalize this process. If you click CREATE & OPEN, the project will be opened right away.
When this process is done, you can access your project by clicking on it via the “Local” tab, to see how to navigate through vSTAGE proceed to the chapter “vSTAGE Editor Overview (login required)”.
Note that Projects can exist locally on your Device. And they can be uploaded to the vHUB cloud, both as backup and for sharing.
Learn more on the Upload and Download (login required) Page.